Using Claude Code in VS Code
Claude Code runs in a terminal, and VS Code has one built in. Running it there means seeing your files and the agent's output in the same window, instead of switching between two apps.
What you'll be able to do
Open a project folder in VS Code, run Claude Code from its built-in terminal, and confirm it can read your files.
Why work from inside VS Code
You could run Claude Code from Terminal or PowerShell directly — as we saw in previous pages. Here is an example of what the terminal interface would look like.
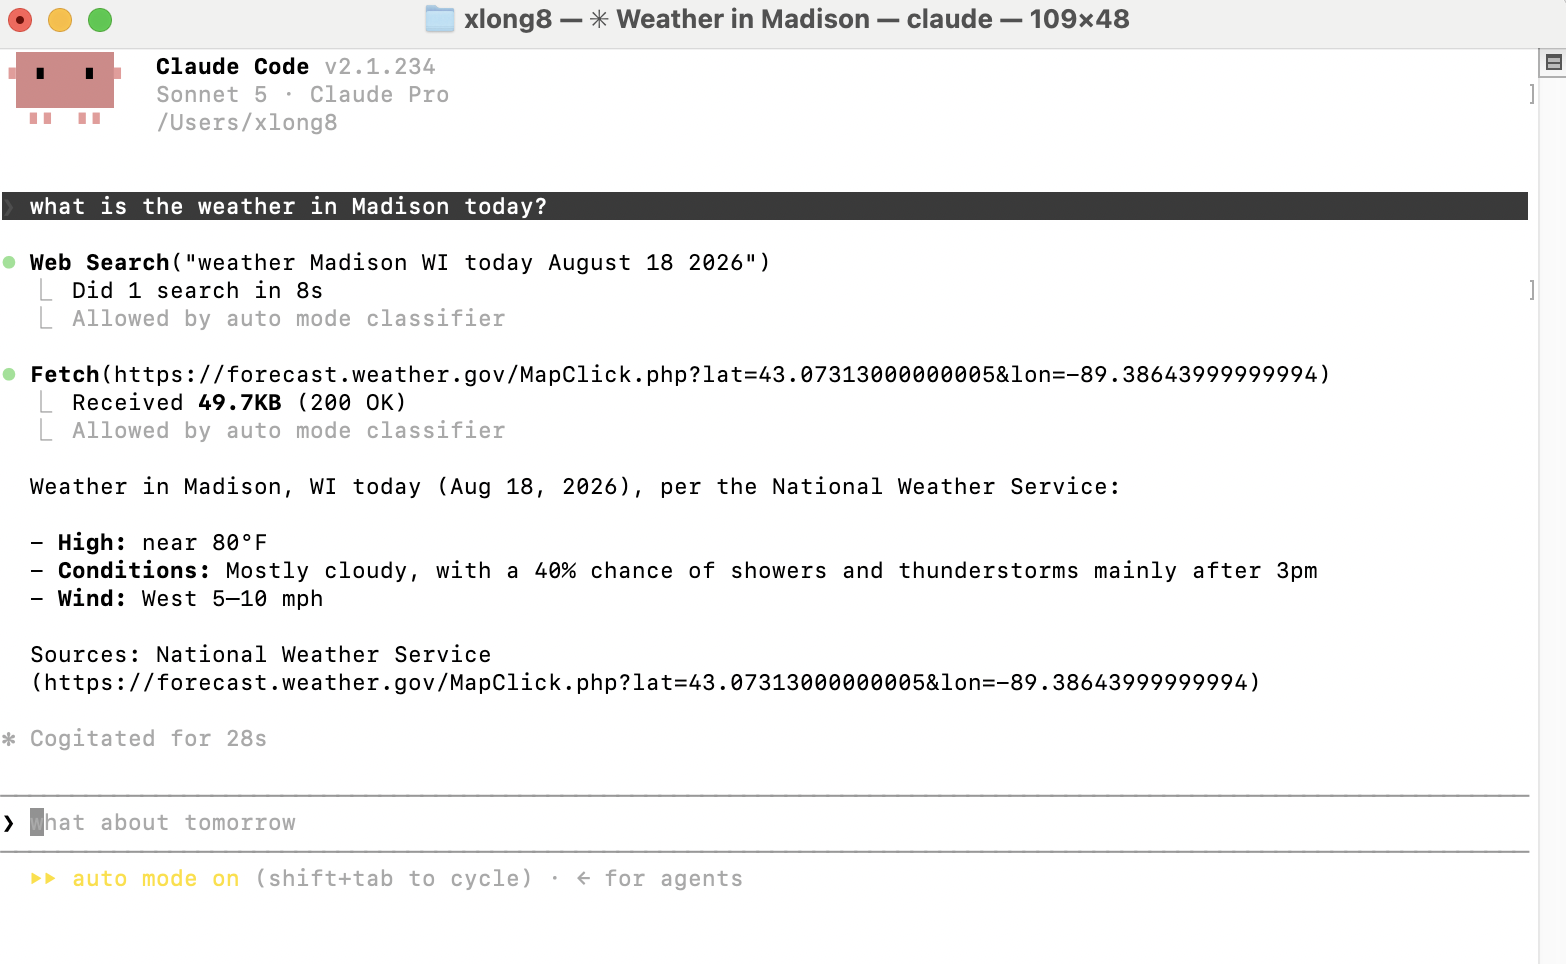
But once you're actually working on something, you'll want to see the files an agent is reading and editing at the same time you're talking to it. VS Code gives you both in one window: the upper part for browsing and reading files, the lower part for the conversation.
Step 1: Get oriented
Open the VS Code app. VS Code's window is divided into a few regions. Below is an example.
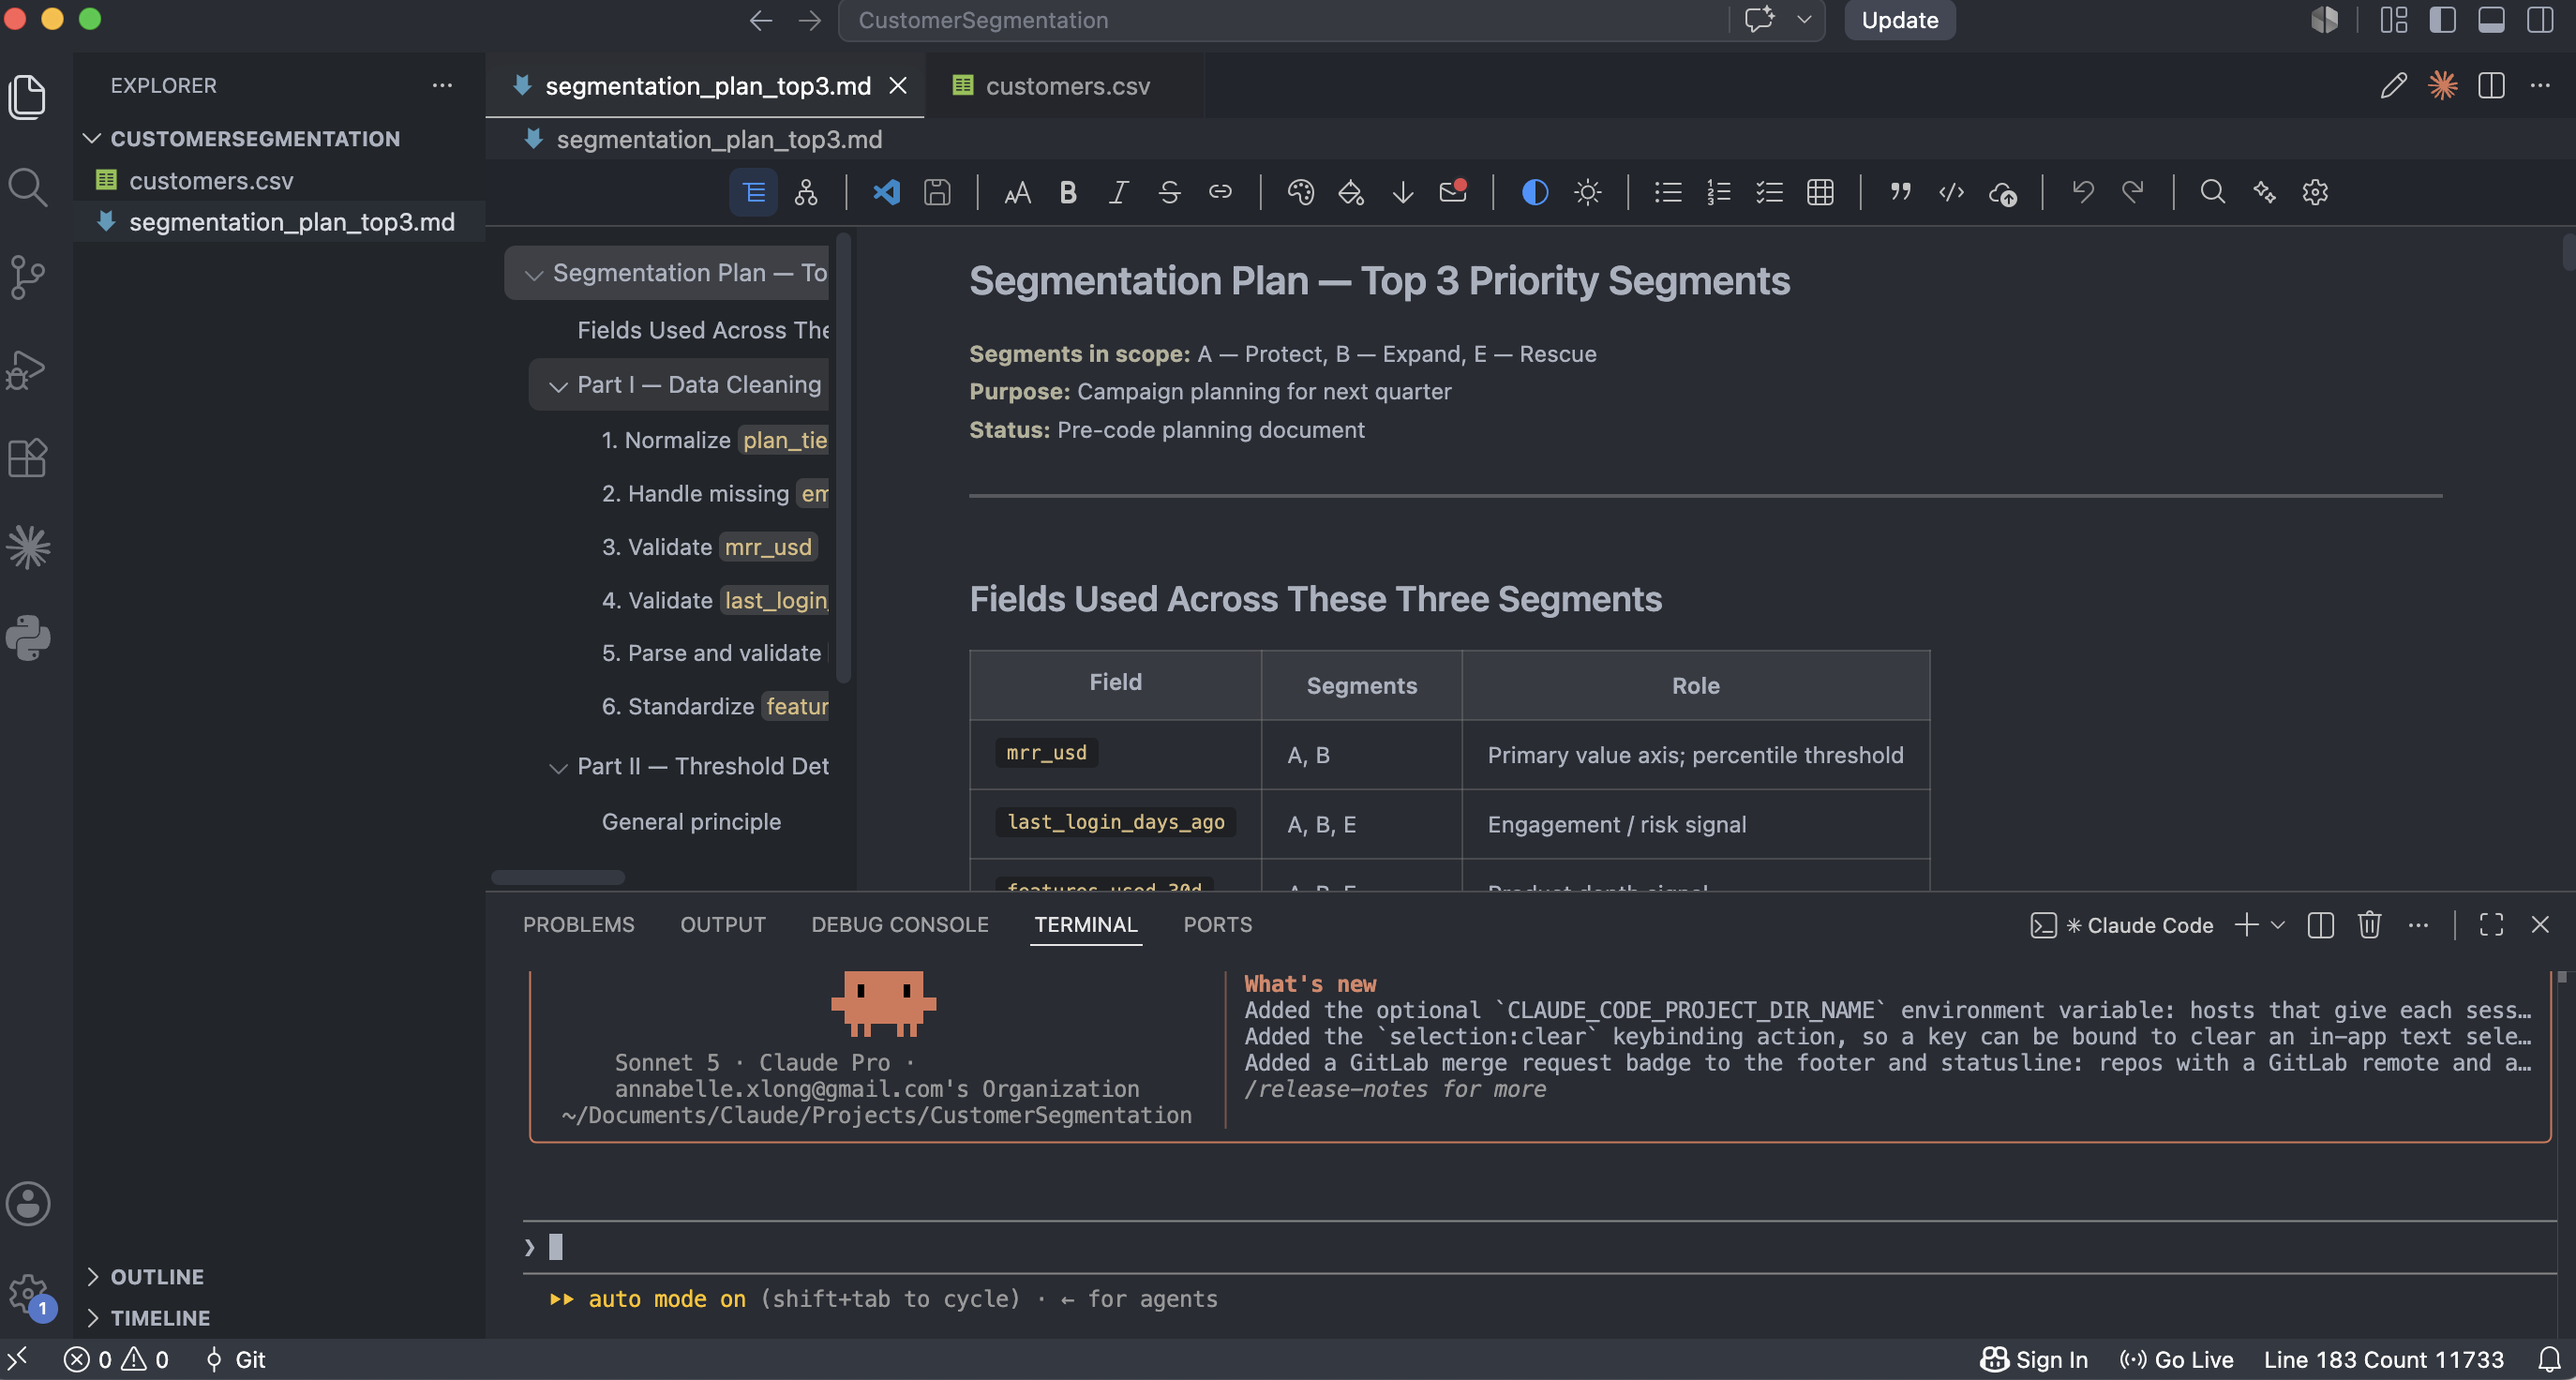
| Region | Where | What it's for |
|---|---|---|
| Activity bar | Far left, a thin strip of icons | Switches what the sidebar shows (files, search, extensions) |
| Sidebar | Left | Browses the files in your open folder |
| Editor | Center, largest area | Shows the contents of whatever file you click |
| Panel | Bottom | Where the integrated terminal — and Claude Code — runs |
| Status bar | Bottom strip | Shows quick info about the current file and project |
.md —
that's Markdown, a plain-text format for writing formatted documents
with symbols instead of a toolbar: # for a heading,
**bold** for bold, - for a bullet. No
proprietary app is required to open one — any text editor works, and
VS Code renders it nicely. AI agents like Claude Code
default to Markdown for almost everything they write: project
instructions (CLAUDE.md), plans, and summaries. Expect to
see a lot of .md files once you start working with an
agent.
(Optional) Step 2: A couple of useful extensions
Let us first install several useful extensions. Open the Extensions view by clicking on the four-tile icon in the activity bar (alternatively, you can use Cmd+Shift+X on Mac, Ctrl+Shift+X on Windows), search for each of the following extensions by name, and click Install:
- Office Viewer — preview
.docxand.xlsxfiles without leaving VS Code. Useful once an agent starts producing spreadsheets and Word documents (though you can always open these files the traditional way - with Microsoft apps). - Git Graph — a visual view of your commit history. Useful once you're relying on Git to review and roll back an agent's changes.
(Optional) Step 3: Change your color theme
VS Code ships with a dark theme by default. If you'd rather work in a lighter interface, or just want to see what else is available, open the Command Palette (Cmd+Shift+P on Mac, Ctrl+Shift+P on Windows), type color theme, and select Preferences: Color Theme. Use the arrow keys to preview each option — the editor updates live — and press Enter to confirm. Light+, Dark+, and Monokai are three built-in options worth trying.
Step 4: Open your project folder
You are strongly suggested to have a dedicated folder for each project. Once you have created such a folder, you can open it in VS code so you can see the contents of that folder and open the files directly. There are three ways to open a folder that is already on your computer.
Method 1: Use the Welcome tab. If VS Code opens with no folder loaded, it shows a Welcome tab with an Open... (Mac) or Open Folder... (Windows) button right on it — click it, select your folder, and confirm.
Method 2: Use the menu. Go to File → Open Folder..., select your folder, and click Select Folder.
Method 3: Drag and drop. Drag the folder from Finder (Mac) or File Explorer (Windows) directly onto the VS Code window.
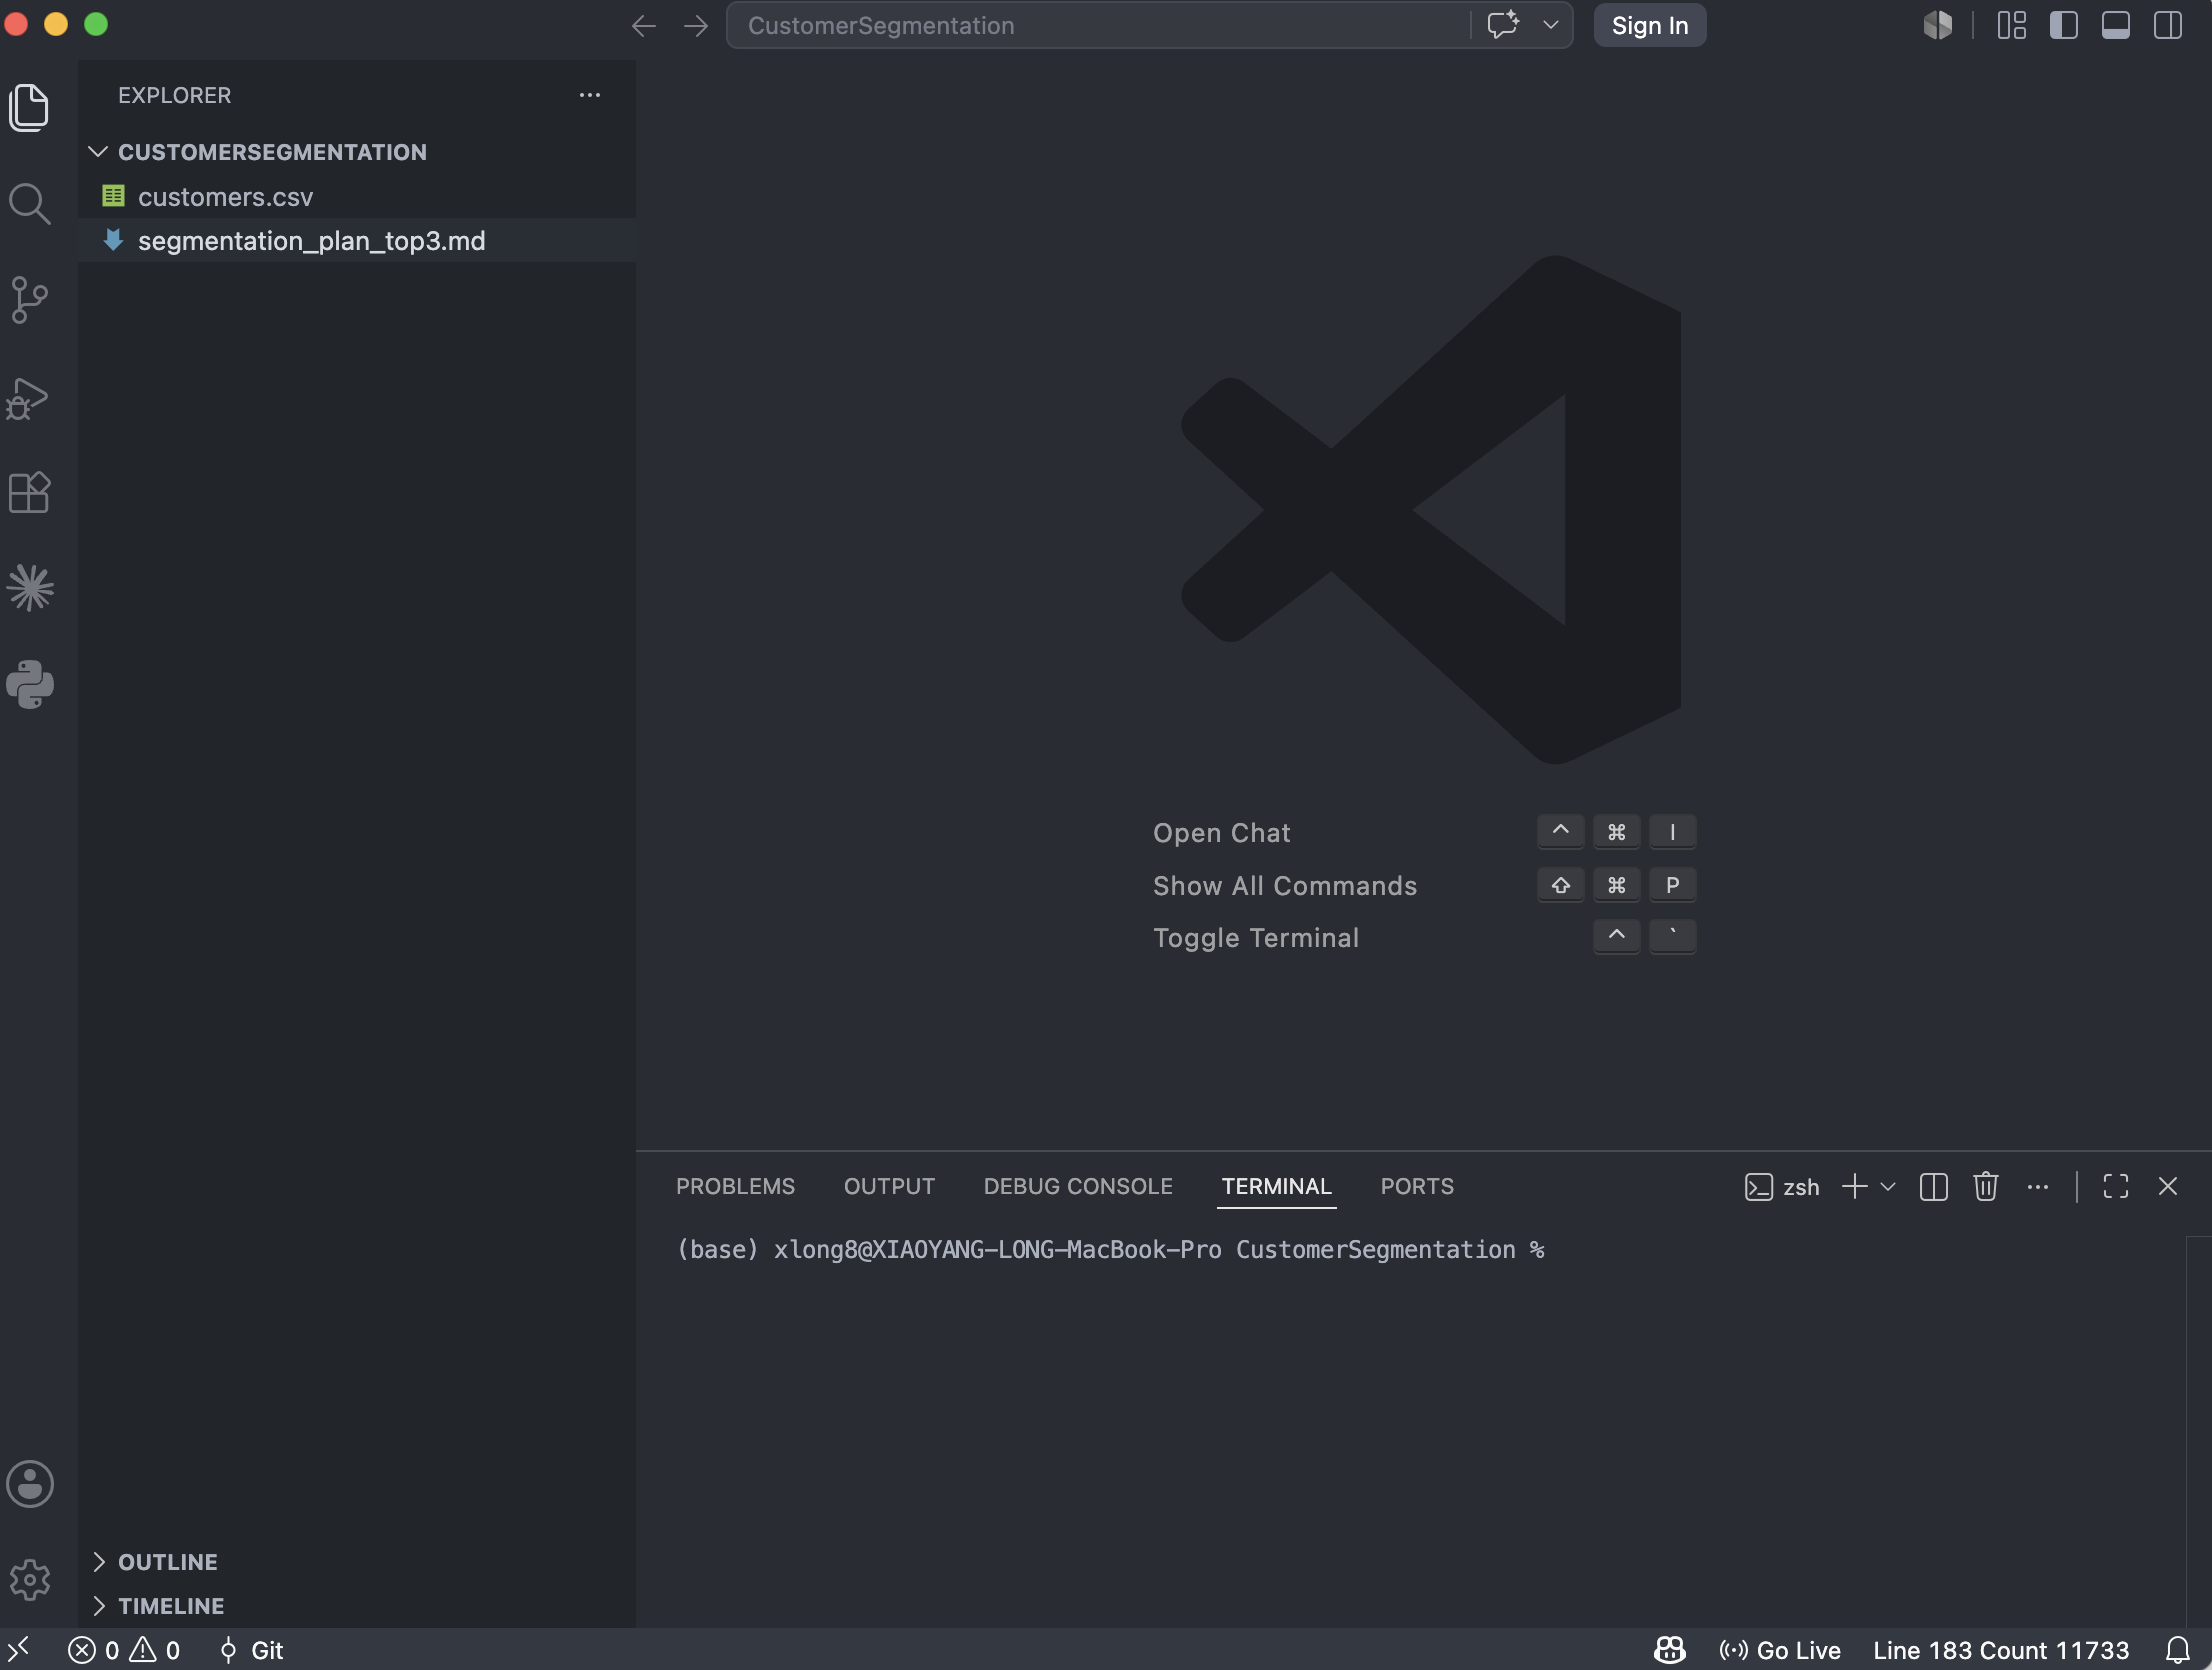
Once a folder is open, the sidebar's Explorer panel lists its contents by name, and the project name replaces the empty Welcome tab at the top of the window.
You can then click on any file to view it in the VS code editor.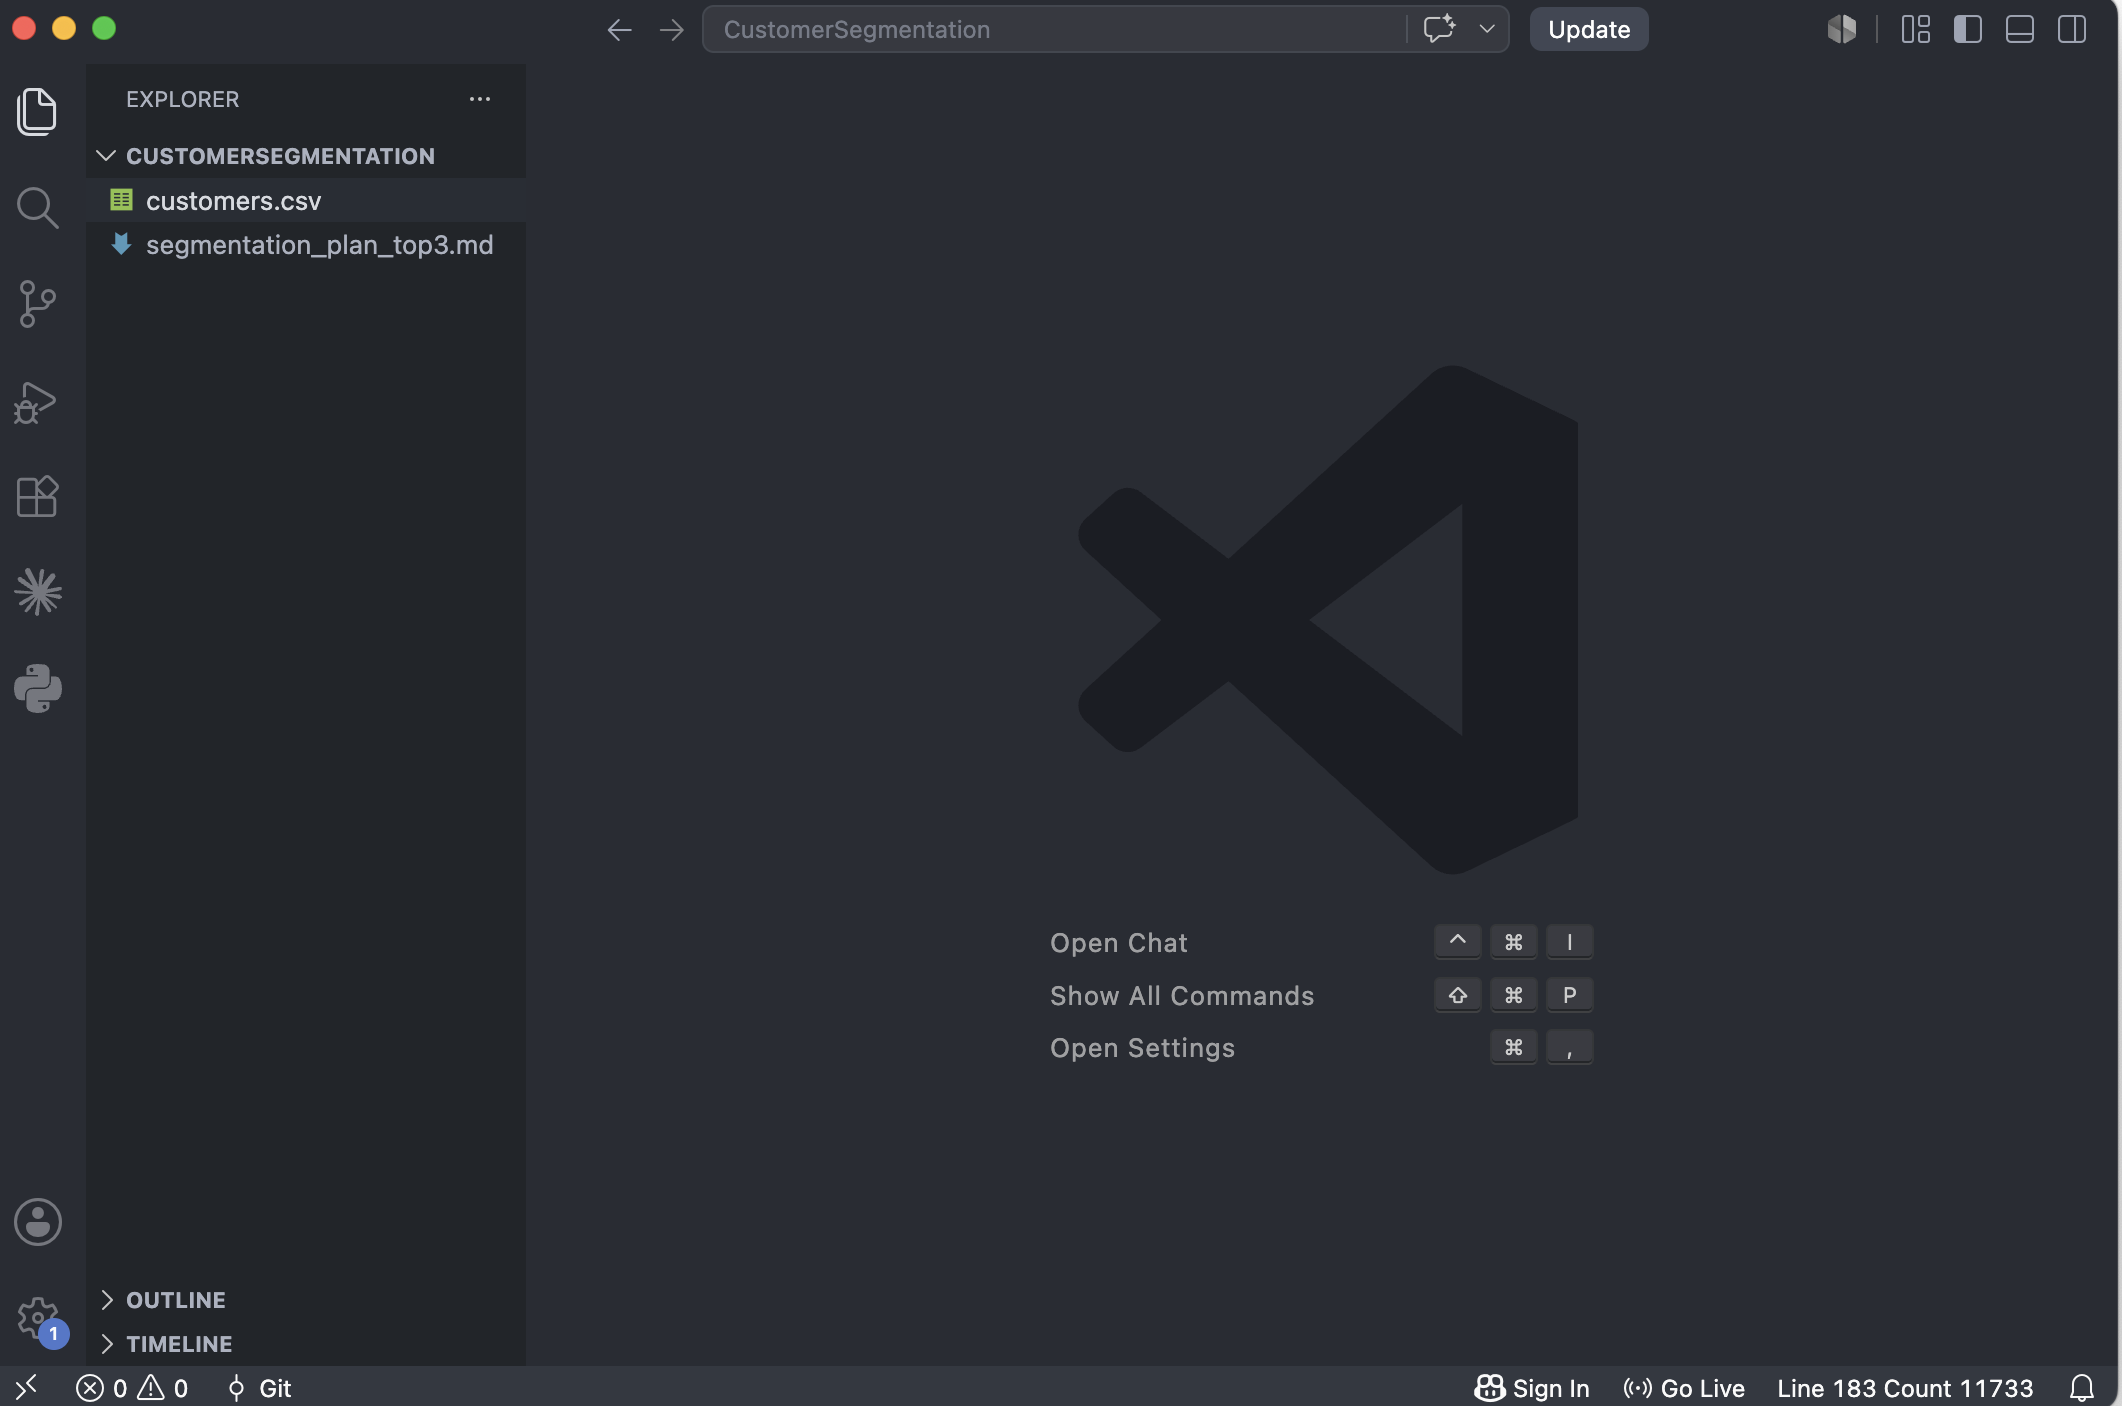
Step 5: Open the integrated terminal
VS Code has a built-in terminal you can use to talk to your computer and AI agent. The simplest way to open it is to click on the second-to-last icon on the upper right bar.
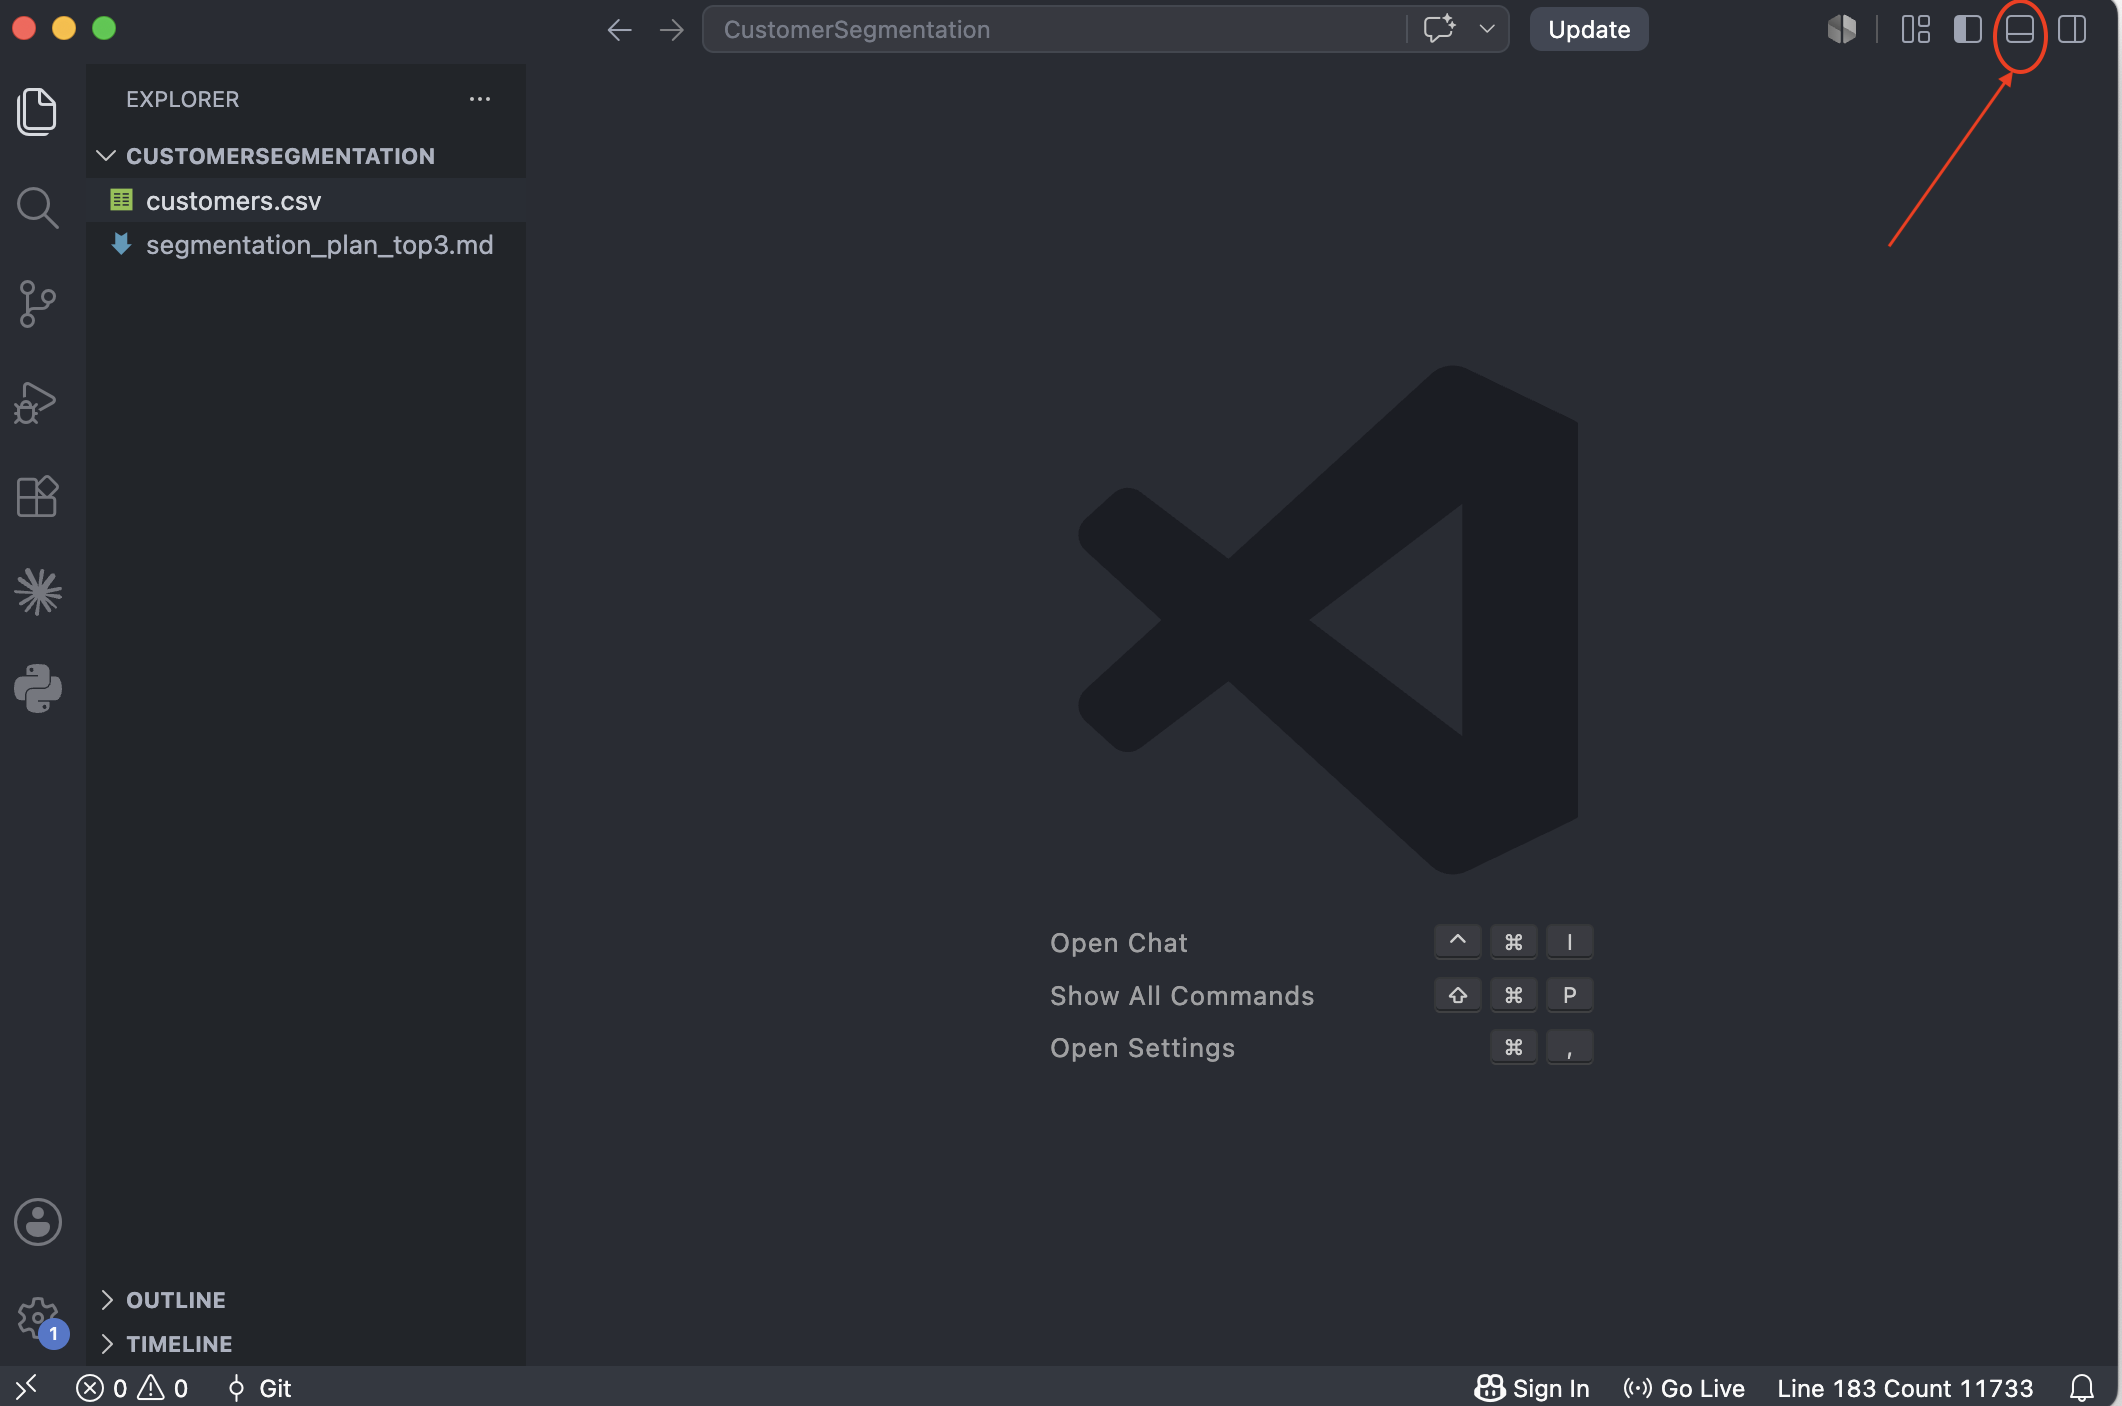
You will now see the terminal on the lower half of the screen. You can drag the border to determine how big each section of the screen is.
Step 6: Launch Claude Code and try it
Open any local folder on your computer. In the VS Code terminal, run:
claudeOnce it loads, you can start typing prompts (just as you would in any browser interface, except now Claude can access the files in your folder). Try a simple prompt:
What files are in this folder?If it lists what's actually there, everything from this module is working — Claude Code is installed, logged in, and reading files from inside VS Code.