Log in to Claude Code
Claude Code needs to know who you are before it will do any work. Two ways to connect it: log in with a Claude account, or use an API key billed by usage.
Two options
There are two options for accessing Claude Code. Option A is recommended for this course.
Option A: Log in with a Claude account
In Terminal (Mac) or PowerShell (Windows), run:
claudeThe first time you run it, Claude Code opens a browser window and asks you to log in — or create an account, if you don't have one — at claude.ai. Approve the request there, then return to your terminal; it's now connected.
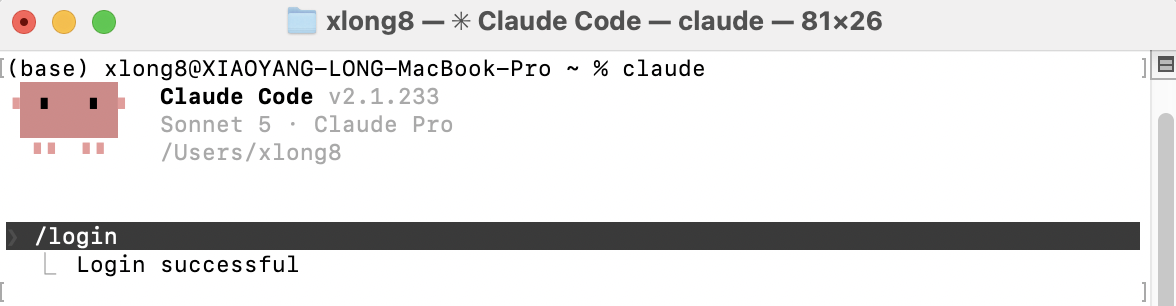
Claude Code isn't available on the Free plan — you'll need at least a Pro plan for this option. For this course, Pro is the recommended choice: it covers everything the exercises ask of you without the extra cost of Max.
/model inside Claude Code to
switch between models — for example, a smaller, faster model for
quick edits and a larger one for harder problems. Pick from the list
that appears, or run /model again anytime to switch back.
Option B: Use an API key instead
An API key bills per request instead of a flat subscription rate — useful if you'd rather pay only for what you use.
Get a key:
- Go to console.anthropic.com and sign in — or create an account, if you don't have one.
- In the left sidebar, click API Keys.
- Click Create Key, give it any name you'll recognize later (e.g. "my laptop"), and confirm.
- Copy the key it shows you. It starts with
sk-ant-— you won't be able to see it again after you leave this page, so copy it now.
Claude Code reads the key from an environment variable — a value your terminal keeps in memory and hands to any program that asks for it, including Claude Code. There are two ways to set it: for just your current terminal window, or permanently, so it's there every time you open a new one.
Quick version (Mac or Windows, this window only): Paste this into Terminal or PowerShell, with your real key in place of the placeholder, and press Enter. It only lasts until you close the window.
Mac (Terminal):
export ANTHROPIC_API_KEY="sk-ant-your-key-here"Windows (PowerShell):
$env:ANTHROPIC_API_KEY="sk-ant-your-key-here"Permanent version, Mac (recommended if you're using an API key):
- Open Terminal.
~/.zshrcis a hidden configuration file in your home folder that Terminal automatically runs every time you open a new window — this is where permanent settings like this one live. You don't need to find or open it yourself; the command below appends a line to it for you. Copy the command exactly, replacesk-ant-your-key-herewith your real key, then paste it into Terminal and press Enter:echo 'export ANTHROPIC_API_KEY="sk-ant-your-key-here"' >> ~/.zshrc- Close Terminal completely and reopen it — the file only gets read when a new window starts.
- Verify it worked:
It should print the key back to you.echo $ANTHROPIC_API_KEY
Permanent version, Windows:
- Open PowerShell.
- Replace
sk-ant-your-key-herewith your real key, then paste this into PowerShell and press Enter. This saves it as a permanent setting on your account, similar to how the Mac version writes to a config file:[System.Environment]::SetEnvironmentVariable('ANTHROPIC_API_KEY', 'sk-ant-your-key-here', 'User') - Close PowerShell completely and reopen it.
- Verify it worked:
It should print the key back to you.echo $env:ANTHROPIC_API_KEY
Which should you use?
For this course, Option A is simpler: a flat, predictable cost with no billing setup. Option B is for your future reference.